What day could be better to start blog section about Raspberry Pi than 4th birthday of this awesome single-board computer!
If for whatever reason you don’t know what it is, that’s the magic box often used for variety open source projects. While it can run several different operating systems, Raspberry Pi Foundation officially supports Raspbian – Debian-based open source OS which in that sense is similar to my favourite Linux Mint. I will post about my experiences installing it via NOOBS later, this time want to share my weekend’s findings about creating new system user which would be capable of fully replacing default user pi.
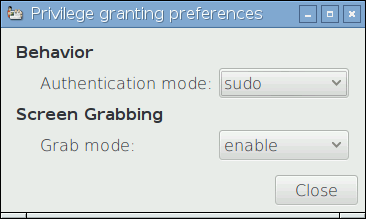
After installing Raspbian on my shiny new Raspberry Pi 2 Model B with 1 GB RAM it booted and logged in automatically with default user pi. Like on many Debian flavours root user is disabled, so whenever administrative actions are needed, graphical dialog pops up to re-authenticate, e. g. when launching GParted:

Using default user pi which autologins to system might be ok if Raspberry only acts as media centre connected to TV, but it’s certainly too little secure to become full-featured server. So first of all autologin should be disabled. Hit menu button (the one with berry icon) and navigate to Preferences > Raspberry Pi Configuration. In System tab look for “Auto Login” and uncheck “Login as user ‘pi'”. Now to get into the system you will need to input pi as username and raspberry as password. You can change this password in the same settings tab by hitting “Change Password…” button.
Like all Linux systems, Raspbian is multi-user OS, therefore it makes sense to create your own user – I usually like having one with my name so that accessing home folder via terminal would always be as easy as “cd /home/gytis“. Raspbian documentation has a handy tutorial about creating and deleting users, however, like in other sources, provided walkthrough is limited to assigning new user sudo capabilities which apparently are not enough to replace pi user’s set of rights. But let’s start from the beginning.
SSH to your Raspberry Pi with username pi and raspberry as password (if you haven’t changed it as described above). In my case I’m creating new user “gytis” here, so make sure to replace it with your desired name.
sudo adduser gytis
Note here I’m using adduser but not general low-level user creation command useradd which would not create user home directory by default unless explicitly instructed. So adduser should ask to set new user password and enter other details. If you want to change password after that, you can always use:
sudo passwd gytis
Pay attention to sudo in the beginning of commands – that’s important since administrative actions must be performed in this way as pi user is sudoer. With the new user created we want to make one sudoer too. Sudoers are stored in file /etc/sudoers, but instead of messing around with this file directly run:
sudo visudo
This will being nano editor (by default) and open sudoers file with .tmp suffix, but don’t worry – when saved required file will be updated automatically. Using visudo is secure way to edit sudoers file.
You have to add new user next to root (see highlighted) – actually there is no need to mention new user explicitly – it is enough to add it to sudo group so move to usermod command leaving /etc/sudoers intact.
#
# This file MUST be edited with the 'visudo' command as root.
#
# Please consider adding local content in /etc/sudoers.d/ instead of
# directly modifying this file.
#
# See the man page for details on how to write a sudoers file.
#
Defaults        env_reset
Defaults        mail_badpass
Defaults        secure_path="/usr/local/sbin:/usr/local/bin:/usr/sbin:/usr/bin:/sbin:/bin"

# Host alias specification

# User alias specification

# Cmnd alias specification

# User privilege specification
root    ALL=(ALL:ALL) ALL
gytis   ALL=(ALL:ALL) ALL

# Allow members of group sudo to execute any command
%sudo   ALL=(ALL:ALL) ALL

# See sudoers(5) for more information on "#include" directives:

#includedir /etc/sudoers.d

pi ALL=(ALL) NOPASSWD: ALL
Next task is to add new user to the same groups like pi except, of course, group called pi. You can list groups of user pi by executing “groups pi” on terminal. With list known, include new user into those groups as well:
sudo usermod -a -G adm,dialout,cdrom,sudo,audio,video,plugdev,games,users,input,netdev,spi,i2c,gpio gytis
Now new user is ready to go. In terminal it’s all nice – user can run commands with sudo, gets asked for password and they run smooth.
If you want to remove sudo capability from pi user, make sure to comment last line. In addition, you can also disable that user by running:
sudo passwd -l pi
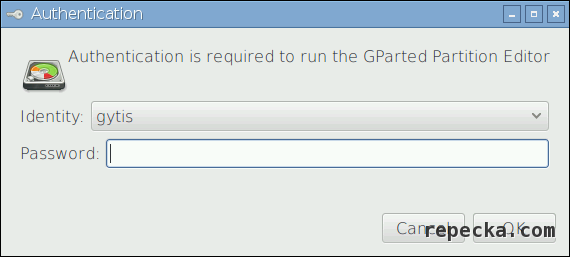
However, if you login to Graphical User Interface with the new user, executing administrative apllication (GParted, Add/Remove programs, etc.) will open up dialog I’ve shown before – there you have to login with either pi or root. And there comes the problem:
Why new user is not listed in Authentication dialog when administrative application is launched in GUI?Actually Raspbian GUI is not relying on sudoers file when listing those users authorised to perform administrative actions – instead it uses polkit (previously know as PolicyKit). This area is little documented for Raspbian since most tutorials cover only sudoing and polkit is somewhat alternative to gksudo or gksu.
You can set which one – graphical sudo or su – you want to use by default. That can be set by executing two commands in terminal:
update-alternatives --set libgksu-gconf-defaults /usr/share/libgksu/debian/gconf-defaults.libgksu-sudo
update-gconf-defaults
This modifies per-user setting for gksu library (libgksu) which is a graphical frontend to su or sudo depending on selection. Their primary purpose is to run graphical commands that need root without the need to run an X terminal emulator and using su directly. If you’re familiar with Microsoft products, something similar was presented with Windows Vista and called User Account Control (UAC).
Instead of above command you can also open graphical selection dialog by running
gsku-properties
To see current selection (sudo or su) you might also use “update-alternatives –display libgksu-gconf-defaults” command in terminal which will show something similar to:
gytis@raspberry:~ $ update-alternatives --display libgksu-gconf-defaults
libgksu-gconf-defaults - manual mode
  link currently points to /usr/share/libgksu/debian/gconf-defaults.libgksu-sudo
/usr/share/libgksu/debian/gconf-defaults.libgksu-su - priority 20
/usr/share/libgksu/debian/gconf-defaults.libgksu-sudo - priority 10
Current 'best' version is '/usr/share/libgksu/debian/gconf-defaults.libgksu-su'.
Special note here is links to application requiring administrative rights should contain “gksudo” call in the beginning. For example, if I want gufw firewall management frontend to run sudoed, I should update shortcut at /usr/share/applications/gufw.desktop from:
Exec=gufw
to:
Exec=gksudo gufw
That’s good enough if you have only couple administrative apps needed for daily use. But if altering all desktop files seems not an option, we should know more about polkit then.
PolicyKit provides an authorization API intended to be used by privileged programs (“MECHANISMS”) offering service to unprivileged programs (“CLIENTS”) through some form of IPC mechanism such as D-Bus or Unix pipes. In this scenario, the mechanism typically treats the client as untrusted. For every request from a client, the mechanism needs to determine if the request is authorized or if it should refuse to service the client. Using the PolicyKit API, a mechanism can offload this decision to a trusted party: The PolicyKit Authority.
In addition to acting as an authority, PolicyKit allows users to obtain temporary authorization through authenticating either an administrative user or the owner of the session the client belongs to. This is useful for scenarios where a mechanism needs to verify that the operator of the system really is the user or really is an administrative user.
After digging into polkit little bit more I discovered it offers a variety of privilege options. One of them is administrative actions that those nice programs like gufw, gparted and others require. Go ahead and edit following file:
nano /etc/polkit-1/localauthority.conf.d/60-desktop-policy.conf
Find part where it has:
[Configuration]
AdminIdentities=unix-user:pi;unix-user:0
And add your new user:
[Configuration]
AdminIdentities=unix-user:gytis;unix-user:pi;unix-user:0
Voila – your user is now available for selection in administrative authentication dialog:
Now enjoy!
Useful documentation:
- Raspberry Pi (Wikipedia)
- Raspbian
- NOOBS installer for Raspbian
- gksudo at Ubuntu
- polkit (previously known as PolicyKit) documentation: Ubuntu, freedesktop.org
Thanks a lot for this how-to! I was going crazy trying to figure out why my new user did not show up in the graphical authentification call. Why is this so poorly documented by Raspbian?! You made my day!
Nice to know it helped, Thomas!
It took a while for me to figure Raspbian uses polkit and then it lead me to finding a solution. At that moment I couldn’t find any documentation covering it. So either everybody uses default user (pi) when accessing through GUI or just connects through SSH and uses Raspberry Pi as a server…